Why Machine Embroidery Is More Than Just a Hobby
Machine embroidery is one of the fastest-growing creative crafts today, blending technology and artistry into beautiful textile design. Whether you’re personalizing clothing, creating home décor, or running a small embroidery business, mastering the basics can dramatically improve your results.
But here’s the truth: most people don’t struggle with creativity—they struggle with stitch quality, tension issues, stabilizers, and digitizing mistakes.
Let’s fix that.
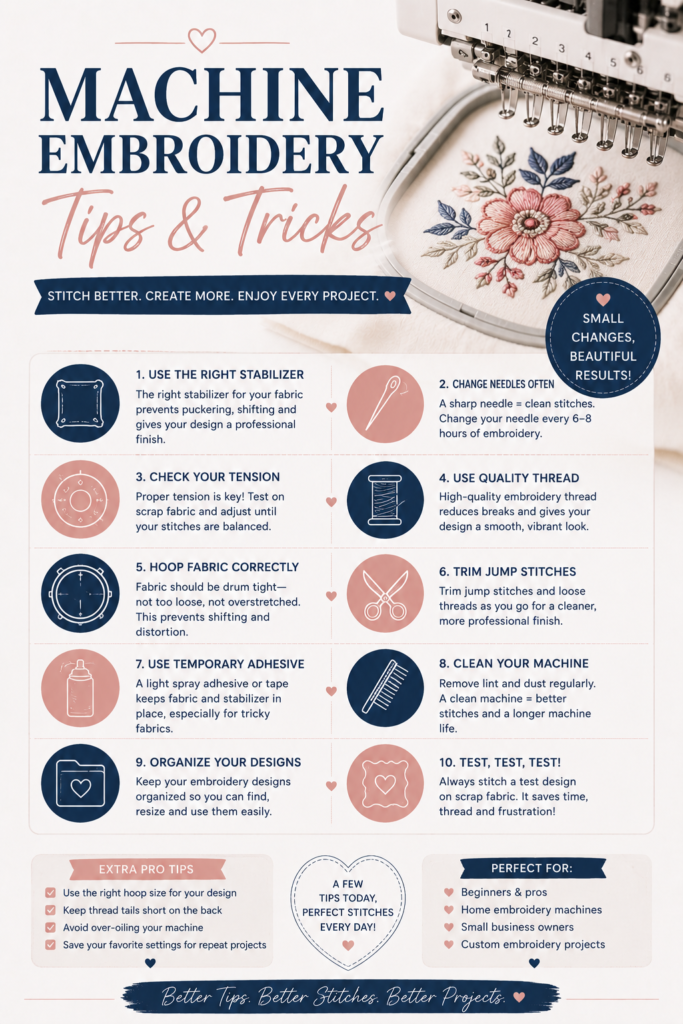
1. Always Match Your Stabilizer to the Fabric
One of the most important machine embroidery tips is choosing the right stabilizer.
- Light fabrics (t-shirts, cotton): Cut-away stabilizer
- Towels & fleece: Tear-away stabilizer
- Delicate fabrics (silk, chiffon): Water-soluble stabilizer
👉 Wrong stabilizer = puckering, distortion, and “why does this look like a melted pizza?”
2. Use the Right Needle (Yes, It Actually Matters)
Many embroidery problems come from using the wrong needle.
- Embroidery needle (75/11 or 90/14): Standard choice
- Ballpoint needle: Knit fabrics
- Sharp needle: Woven fabrics
Change your needle every 8–10 hours of stitching. A dull needle is basically sabotage in disguise.
3. Thread Quality Makes or Breaks Your Design
Cheap thread = frequent breaks, dull colors, and frustration.
- Polyester thread = strong + vibrant (best for machine embroidery)
- Rayon thread = glossy + decorative (less durable)
Pro tip: if your machine “randomly hates you,” check the thread first.
4. Hooping Is 50% of Success
If your fabric is not properly hooped, even the best design will fail.
✔ Fabric should be taut like a drum
✔ No wrinkles under the hoop
✔ Stabilizer should move with fabric (not separately)
Loose hooping = shifting designs = sadness.
5. Slow Down for Better Stitch Quality
Speed is not your friend in machine embroidery.
Running your machine too fast can cause:
- Thread breaks
- Skipped stitches
- Misalignment
Sometimes embroidery is like coffee—slow brew gives better results.
6. Test Your Design Before Stitching the Final Fabric
Always run a test stitch on:
- Similar fabric
- Scrap material
- Same stabilizer type
This saves expensive mistakes and emotional damage.
7. Understand Density in Digitized Designs
Too dense = stiff fabric and thread breaks
Too loose = empty, unfinished look
Good digitizing balances:
- Stitch density
- Fabric type
- Design size
If your embroidery feels like cardboard, density is the culprit.
8. Keep Your Machine Clean (Seriously)
Lint buildup is silent destruction.
Clean:
- Bobbin area
- Needle plate
- Thread path
A clean machine stitches like a dream. A dirty one behaves like it’s on strike.
9. Don’t Ignore Tension Settings
If stitches look messy underneath:
- Adjust upper thread tension
- Check bobbin tension
- Re-thread machine completely
Most “mysterious embroidery problems” are actually tension problems in disguise.
10. Save Your Settings for Consistency
If your machine allows it:
- Save stitch combinations
- Record thread colors
- Note stabilizer + fabric combos
This is how embroidery goes from hobby to repeatable skill—or even business.
Final Thought
Machine embroidery isn’t about having the most expensive machine—it’s about mastering the small details that most people ignore.
And once you get those right, your machine stops being unpredictable… and starts feeling like a creative partner.