Machine embroidery doesn’t have to be complicated, slow, or frustrating. In fact, most problems people face—thread breaks, puckering, misalignment—can be solved with a few simple machine embroidery hacks.
These aren’t “theory tips.” These are practical, real-world tricks that help you get better results with less effort.
Let’s dive into the most useful embroidery hacks that actually make a difference.
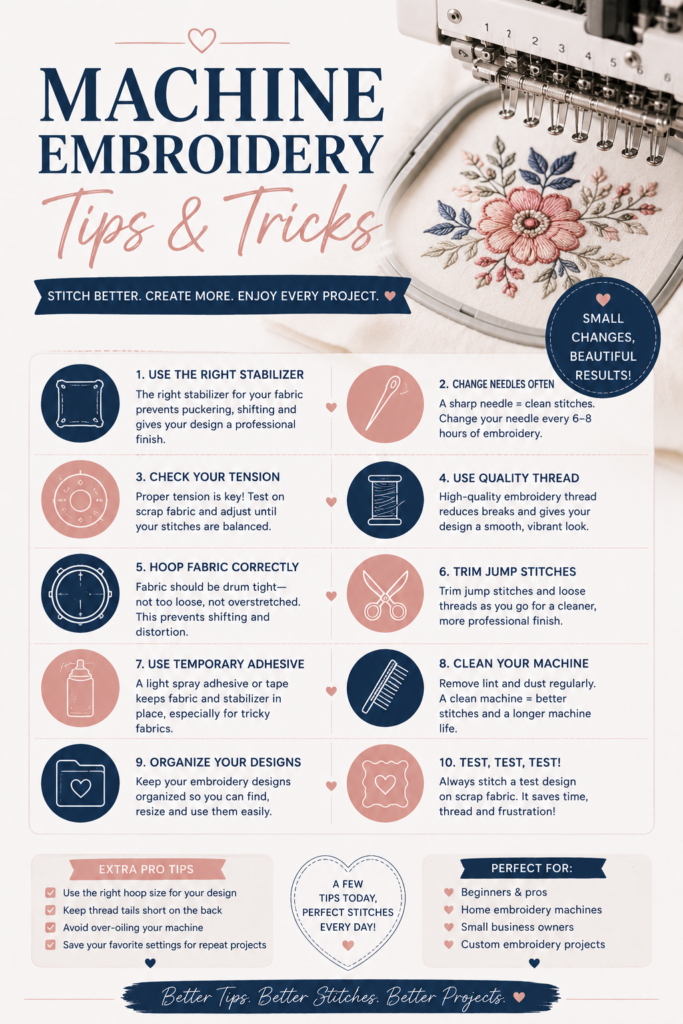
1. Use Sticky Stabilizer for Perfect Placement
One of the easiest embroidery hacks is switching to sticky stabilizer.
Why it works:
- Holds fabric in place without shifting
- Eliminates hoop marks on delicate fabrics
- Great for small or tricky items
👉 Perfect for towels, caps, and hard-to-hoop items.
2. Spray Adhesive = Invisible Third Hand
Temporary adhesive spray helps bond fabric to stabilizer.
Benefits:
- Prevents fabric movement
- Improves stitch accuracy
- Reduces puckering risk
🚫 Use lightly—too much spray can cause buildup.
3. Double Up Stabilizer for Problem Fabrics
If your design keeps failing, don’t change everything—just double the stabilizer.
When to use:
- Thin fabrics
- High-density designs
- Stretchy materials
👉 More stability = cleaner embroidery.
4. Slow Down Your Machine Speed
Fast stitching looks impressive but causes problems.
Slower speed helps:
- Reduce thread breaks
- Improve stitch precision
- Prevent fabric distortion
Think of it as “precision mode.”
5. Pre-Test Everything (Even When You’re Sure)
Always test:
- Fabric type
- Stabilizer combination
- Thread brand
👉 Even experienced embroiderers skip this—and regret it.
6. Keep a “Go-To Settings List”
Create a personal cheat sheet:
- Needle type per fabric
- Stabilizer combinations
- Thread tension settings
This turns guessing into consistency.
7. Use Water-Soluble Topper for Fleece & Towels
Without a topper, stitches sink into fabric.
Solution:
- Water-soluble film on top
- Keeps stitches visible and crisp
👉 One of the most underrated embroidery hacks.
8. Change Needles More Often Than You Think
A dull needle ruins everything silently.
Rule:
Change every 8–10 hours of stitching
Even if it looks fine—it’s not.
9. Re-Thread When Problems Appear
Instead of adjusting endlessly:
✔ Remove thread completely
✔ Re-thread top and bobbin
✔ Restart machine
👉 This fixes more issues than any setting change.
10. Use the Smallest Hoop Possible
Bigger hoop ≠ better results.
Why smaller is better:
- Less fabric movement
- Better tension control
- Higher stitch accuracy
11. Mark Fabric Center Points
Simple but powerful hack:
✔ Fold fabric lightly
✔ Mark center with washable pen
✔ Align with hoop center
👉 Prevents misaligned designs instantly.
12. Keep Thread Path Clean and Smooth
Lint and dust create invisible friction.
Fix:
- Clean thread guides regularly
- Check tension discs
- Remove buildup weekly
13. Save Successful Combinations
When something works:
- Write it down
- Save settings
- Take a photo
👉 This builds your personal embroidery “formula library.”
14. Use Lighter Density Designs for Beginners
Dense designs cause:
- Puckering
- Thread breaks
- Fabric stress
Start simple, then scale up complexity.
15. Run a “Mini Stitch Test” Before Every Project
A small test stitch saves:
- Fabric
- Time
- Frustration
Even a 2-minute test can prevent disaster.
Final Thought
Machine embroidery gets dramatically easier when you stop “fighting the machine” and start using smart shortcuts.
A few small hacks can turn messy stitching into clean, professional results—and make the whole process feel a lot more fun.