Puckering is one of the most frustrating problems in machine embroidery. You start with a beautiful design idea—and end up with fabric that looks wrinkled, stretched, or “pulled together” around the stitches.
The good news? Puckering is almost always preventable. Once you understand what causes it, you can fix it quickly and dramatically improve your embroidery quality.
Let’s break it down.
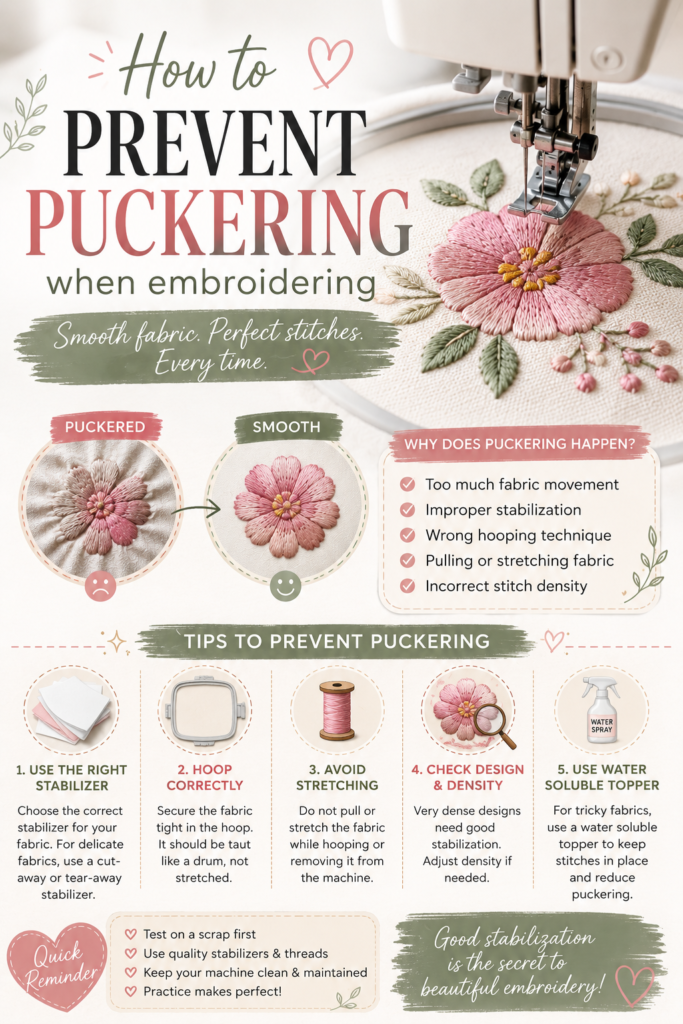
What Causes Puckering in Machine Embroidery?
Puckering happens when the fabric cannot properly support the tension of the stitches. Instead of lying flat, the fabric is pulled and distorted.
The most common causes include:
- Incorrect stabilizer choice
- Poor hooping technique
- Wrong thread tension
- Fabric too lightweight for dense designs
- Using the wrong needle
- Overly dense embroidery designs
Think of it like this: embroidery is a tug-of-war. If fabric and stabilizer lose, puckering wins.
1. Choose the Right Stabilizer (This Is the #1 Fix)
Stabilizer is the foundation of smooth embroidery.
Quick guide:
- Cut-away stabilizer: Best for knits, t-shirts, stretchy fabrics
- Tear-away stabilizer: Good for stable woven fabrics
- Water-soluble stabilizer: Ideal for delicate or textured fabrics
👉 If you’re getting puckering, 80% of the time your stabilizer is too weak.
2. Hoop Fabric Correctly (No Wrinkles Allowed)
Improper hooping is one of the biggest hidden causes of puckering.
✔ Fabric must be smooth and flat
✔ Stabilizer must move with the fabric
✔ The hoop should hold everything firmly (like a drum)
🚫 If the fabric shifts inside the hoop—even slightly—puckering becomes almost guaranteed.
3. Use Proper Thread Tension Settings
Incorrect tension pulls the fabric unevenly.
Signs of tension issues:
- Fabric gathers around stitches
- Thread loops underneath
- Uneven stitch appearance
Fix it:
- Re-thread your machine completely
- Adjust upper thread tension gradually
- Check bobbin tension if needed
Small adjustments = big improvements.
4. Match Design Density to Fabric Type
Dense embroidery designs on lightweight fabric are a recipe for puckering.
Rule of thumb:
- Light fabrics → low density designs
- Medium fabrics → medium density
- Heavy fabrics → can handle dense fills
If your design feels “too heavy,” your fabric is basically being overworked.
5. Use the Correct Needle Size and Type
A wrong needle can distort fabric and create tension points.
- Embroidery needle (75/11 or 90/14): Standard choice
- Ballpoint needle: Best for stretchy fabrics
- Sharp needle: Best for tightly woven materials
Also: change needles regularly. A dull needle is a silent puckering machine.
6. Don’t Skip Pre-Shrinking Fabric
Fabric shrinkage after stitching can cause post-embroidery puckering.
Especially important for:
- Cotton
- Linen
- Natural fiber blends
Pre-wash and iron your fabric before hooping.
7. Slow Down Your Machine Speed
Fast stitching increases stress on fabric and stabilizer.
Slower speed helps:
- Reduce fabric movement
- Improve stitch accuracy
- Minimize pulling forces
Sometimes better embroidery = simply slowing down.
8. Avoid Overly Large Designs on Small Fabric Areas
If the design is too big for the fabric space:
- Fabric gets pulled inward
- Stabilizer struggles to support stitches
- Puckering appears around edges
Always match design size to fabric strength.
9. Use Proper Fabric Support Techniques
For tricky fabrics, add extra reinforcement:
- Double stabilizer layers
- Temporary adhesive spray
- Floating stabilizer technique
- Fusible interfacing (for very thin fabrics)
Extra support = smoother results.
10. Test Stitch Before Final Embroidery
Always test on:
- Same fabric type
- Same stabilizer
- Same design density
This helps you catch puckering before it ruins your final project.
Quick Troubleshooting Checklist (Save This)
If puckering happens, check in this order:
- Stabilizer strength
- Hooping tension
- Thread tension
- Needle type
- Design density
- Fabric suitability
Most issues are solved in the first three steps.
Final Thought
Puckering isn’t random—it’s a signal. Your fabric is telling you something is off in stabilizer, tension, or setup.
Once you learn to “read” those signals, machine embroidery becomes predictable, smooth, and honestly… a lot more satisfying.